
Last Updated on February 20, 2020 by Karolina Miseviciute
Pearls are some of the most exquisite gemstones in the world. They’ve been treasured since ancient times and continue to be an extremely popular option today. Some people love the beauty that these gems possess, but aren’t exactly fond of ordinary pearl necklaces or bracelets. That’s mostly because they lack uniqueness and creativity. If you are looking for ways to make your own pearl jewelry, you’ve come to the right place! Here, you’ll find 7 stunning DIY pearl jewelry ideas that are sure to inspire you.
A Fully Customizable Timeless Pearl Necklace
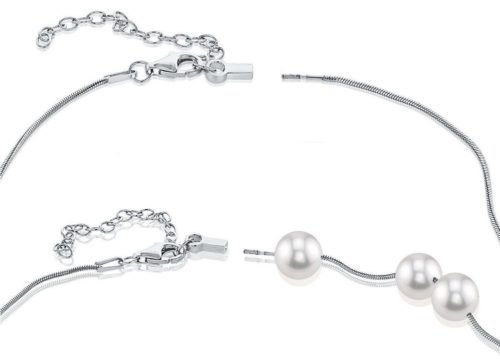
(Image Courtesy of The Pearl Source)
Let’s begin our list with a stunning pearl necklace from The Pearl Source that is fully customizable, not only in design but also in the way you wear it. The necklace features good quality, authentic pearls. The patented technology of this necklace allows you to add and remove pearls yourself to create numerous different styles. There are a variety of pearl types, colors, sizes and qualities that you can choose from to design your necklace.
Start building your own necklace here.
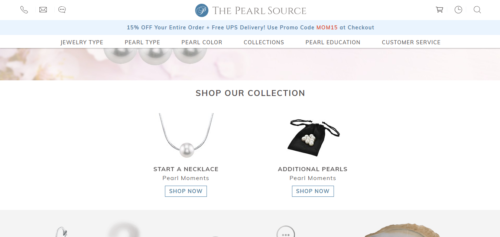
To begin, choose which pearl quality you want to go for.
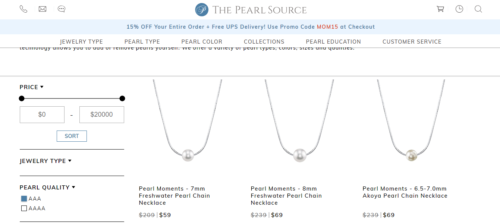
Afterward, pick the pearl size.

Once you’ve decided on one, click on it to get to the next step. Here, you can select a chain, choose the color of the pearls, and select the number of pearls you like.
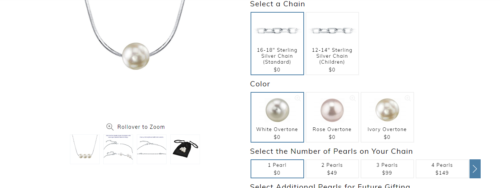
Once the necklace arrives, you can choose to wear a single pearl for a more casual look or add more pearls to create a strand for a more elegant ensemble. This fully customizable pearl necklace can truly represent you and your style.
Click Here to Build Your Own Pearl Necklace
Ocean Vibes Await with these Earrings
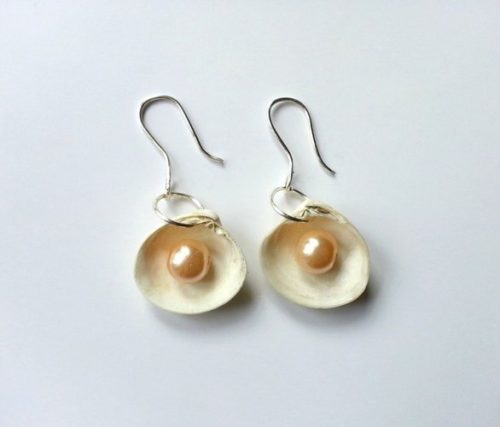
(Image Courtesy of Instructables)
Next up is a charming pair of nautical-themed earrings that are a fun option for the summer season. Begin by marking a spot in the center of both seashells and making a pin-sized hole using an awl. Next, glue your pearls in the center of the seashells. For this DIY idea, use faux pearls beads that come in a variety of colors you can choose from. You can also incorporate real golden south sea pearls. Using silver coated craft wire, make two jump rings and two earring hooks. Once you’ve done that, attach the jump rings to the seashells using the hole. Finally, attach the hooks to the jump rings. This is a quick and easy piece of jewelry that can add a creative touch to your favorite vacation outfit.
Click Here to See the Full Tutorial
A Bo-Chic Nested Pearl Ring
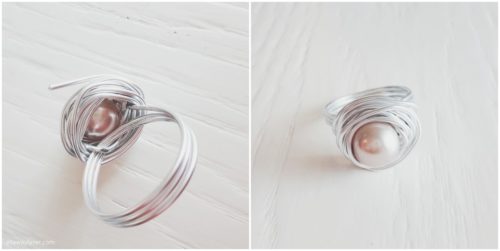
(Image Courtesy of Ella Wayfarer)
Here is an easy-to-make DIY pearl ring idea from Ella Wayfarer. For this ring, wrap 1mm aluminum wire around a ring mandrel three times using pliers before threading the wire through the pearl. This will function as the band. Once you’ve done that, put the ring on the mandrel again. However, this time thread the wire underneath the base of the ring. Wrap the wire around the ring until you are satisfied with the size of the nest. A small tip: when you cut the wire, use the pliers to tuck the end into the nest. This ring will quickly grow to be one of your favorites since it’s great for pairing it with other rings. If you want to add a little bit of extra to this ring, use a single authentic loose pearl. The ring is secure enough to use a real pearl with it. Additionally, the luster of the pearl will make the ring pop.
Knotted to DIY Perfection
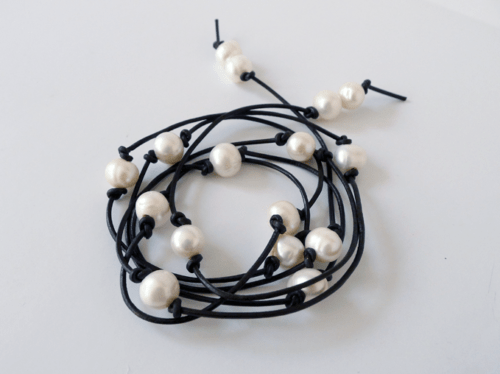
(Image Courtesy of Thanks, I Made It)
With DIY jewelry, you’re able to create pieces that aren’t available anywhere else. This knotted pearl leather bracelet from Thanks, I Made It is easy to make. It only requires two materials to create a sophisticated look and feel. All you’ll need – sixteen pearl beads (with 2mm holes) and approximately two and a half yards of 1.5mm thick leather cord. To begin, hook the pearls onto the wire with knots on both ends about two inches away from the end. From there, add a single pearl every 5 inches and finish on the other end with another pair of pearls. Loosely tie the ends together to secure the bracelet when you wear it. That is all it takes to create this sleek bracelet that works extraordinarily with different outfits.
Double the Pearls for Double the Elegance

(Image Courtesy of Honestly WTF)
Create this double pearl ring that oozes of class and refinement. For it, you’ll need an asymmetrical pair of pearls, a thin wire ring, pliers, and super glue. Start by cutting a small piece out of a thin gold colored ring. Next, delicately insert super glue inside the holes of the pearls and attach them to each end of the ring. Once the ring has dried and the pearls are in place, you can mold the ring to fit your finger size. White south sea pearls also work great for this ring particularly because the setting of it allows the deep glow of the pearls to reflect from all angles. Use this ring to perfectly accessorize your outfit for a special occasion and add a dash of lavishness to your look.
Click Here to See the Full Tutorial
A Ribbon of Pearls
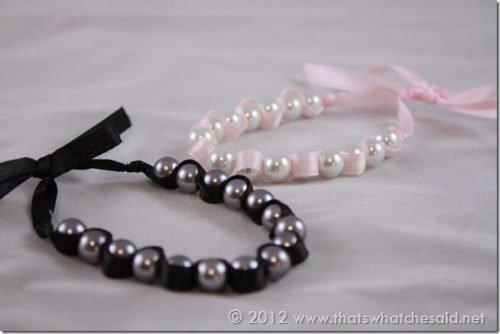
(Image Courtesy of That’s What Che Said)
This ultra-feminine bracelet by That’s What Che Said is a great DIY jewelry idea that can be the perfect complementary accessory for a preppy outfit. The materials you need include a quarter-inch ribbon, sixteen 8mm faux pearls (you could also use these real pearls), 0.5mm Stretch Magic jewelry cord, an embroidery needle, and a pair of scissors. Start by cutting approximately 18-20 inches of the ribbon, then tie a couple of knots about 6 inches away from one of the ends. Next, cut a 12-inch piece of the Stretch Magic jewelry cord, tie several knots on one end of it, and thread a needle through the knots on both the jewelry cord and the ribbon. Add a pearl to the jewelry cord thread and run it through the ribbon so that the pearl is blanketed by the ribbon on both sides. Add another pearl to the thread and again, run it through the ribbon. However, this time wrap the ribbon back over the second pearl. Repeat this process for all sixteen pearls and finish by tying a knot around the ribbon with the jewelry cord numerous times. Leave a couple of inches of ribbon on both sides. When you’re ready to wear your fabulous new bracelet, simply tie the ends together in a cute bow.
A 90s-Inspired Pearl Choker
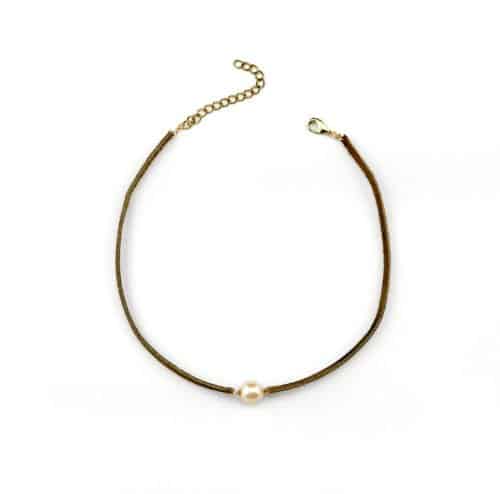
(Image Courtesy of Jamie B. Hannigan)
To start, cut a piece of leather cord that fits tightly around your neck. Next, cut the cord into two equal halves, then use a tapestry needle to make a small hole on the end of one the cords. Thread a four-inch piece of 24-gauge gold wire into the hole you poked, create a wrapped loop, then trim the excess wire. Thread a pearl bead using the excess wire, then poke a hole into the other half of the cord. Connect both pieces of cord to the pearl bead by threading the wire through the hole and creating another wrapped loop. Cut a one-inch from each end of the cord, and lastly, attach the chain and the clasp. Not only is this necklace super trendy, but the pearl gives it a unique touch that makes it simply special.
Click Here to See the Full Tutorial
Which one of the seven DIY pearl jewelry ideas did you like the most? Get started on making your own piece of jewelry that you will treasure for a lifetime.

- 30 Famous Pearl Quotes Every Jewelry Lover Needs to Know - May 30, 2018
- 10 Most Valuable Gemstones in the World - May 14, 2018
- 7 DIY Pearl Jewelry Ideas - May 13, 2018